How To Set Up Intelligent Platform Management Interface (IPMI)
All of our Storinator Massive Storage Servers, as well as many other computers, have a remote management interface called Intelligent Platform Management Interface (IPMI). In this blog, I’m going to explain how to set up IPMI so that you can do certain things remotely, such as turning your server on and off, monitoring your Power Supply Unit statistics, as well as troubleshooting and repairing your server at BIOS (hardware settings) level.
What is Remote Access (IPMI)?
IPMI is an open, industry-standard interface that was designed to manage server systems over a network. IPMI provides a way to manage a computer that may be powered off or otherwise unresponsive by using a network connection directly to the hardware (rather than to an operating system or login shell). This service enables you to monitor, control and retrieve information about your server platform as a standard. IMPI supports system recovery (system reset or power off), component monitoring (CPU temp, fan speed), logging of system events, and alerting.
Some people may be familiar with proprietary management interfaces such as Hewlett Packer’s iLO (Integrated Lights-Out) or Dell’s DRAC (Dell Remote Access Controller). IPMI offers the same essential base functionality, but the proprietary systems have some “nice” extra features. These proprietary systems require special licensing to use, whereas IPMI is free and there is no subscription necessary.
But what is more important is that all of the aforementioned service processors – iDRAC, iLO – are compliant with this standard (or with a specific version of it) so you can either use vendor specific tools to communicate with them or standardized IPMI tools. This may be an advantage when you need to integrate the platform with some monitoring system which supports IPMI standard but not a specific service processor.
Want to know more? Keep reading and discover how easy it is to set up your IPMI!
How to set up Remote Access (IPMI)
The IPMI initial setup process takes very little time. Just follow the four steps below and you can be accessing your server remotely from anywhere in no time.
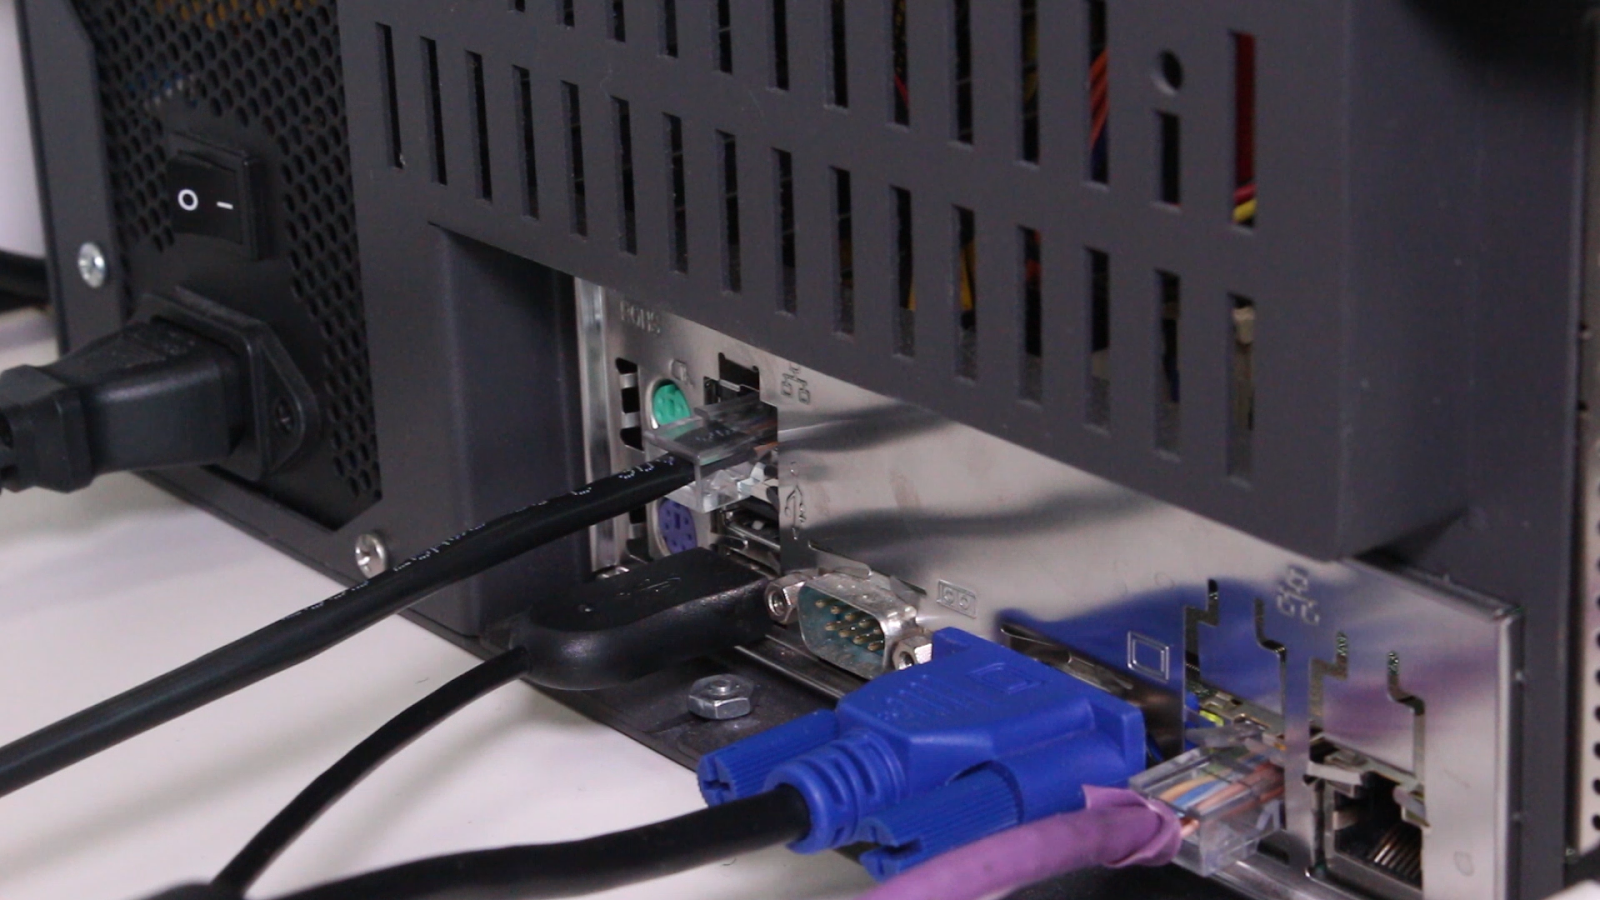
- Plug an Ethernet cable into an Ethernet port and your network switch. On X9 boards or older, the IPMI port is pictured below where the black Ethernet cable is plugged in above the USB ports.
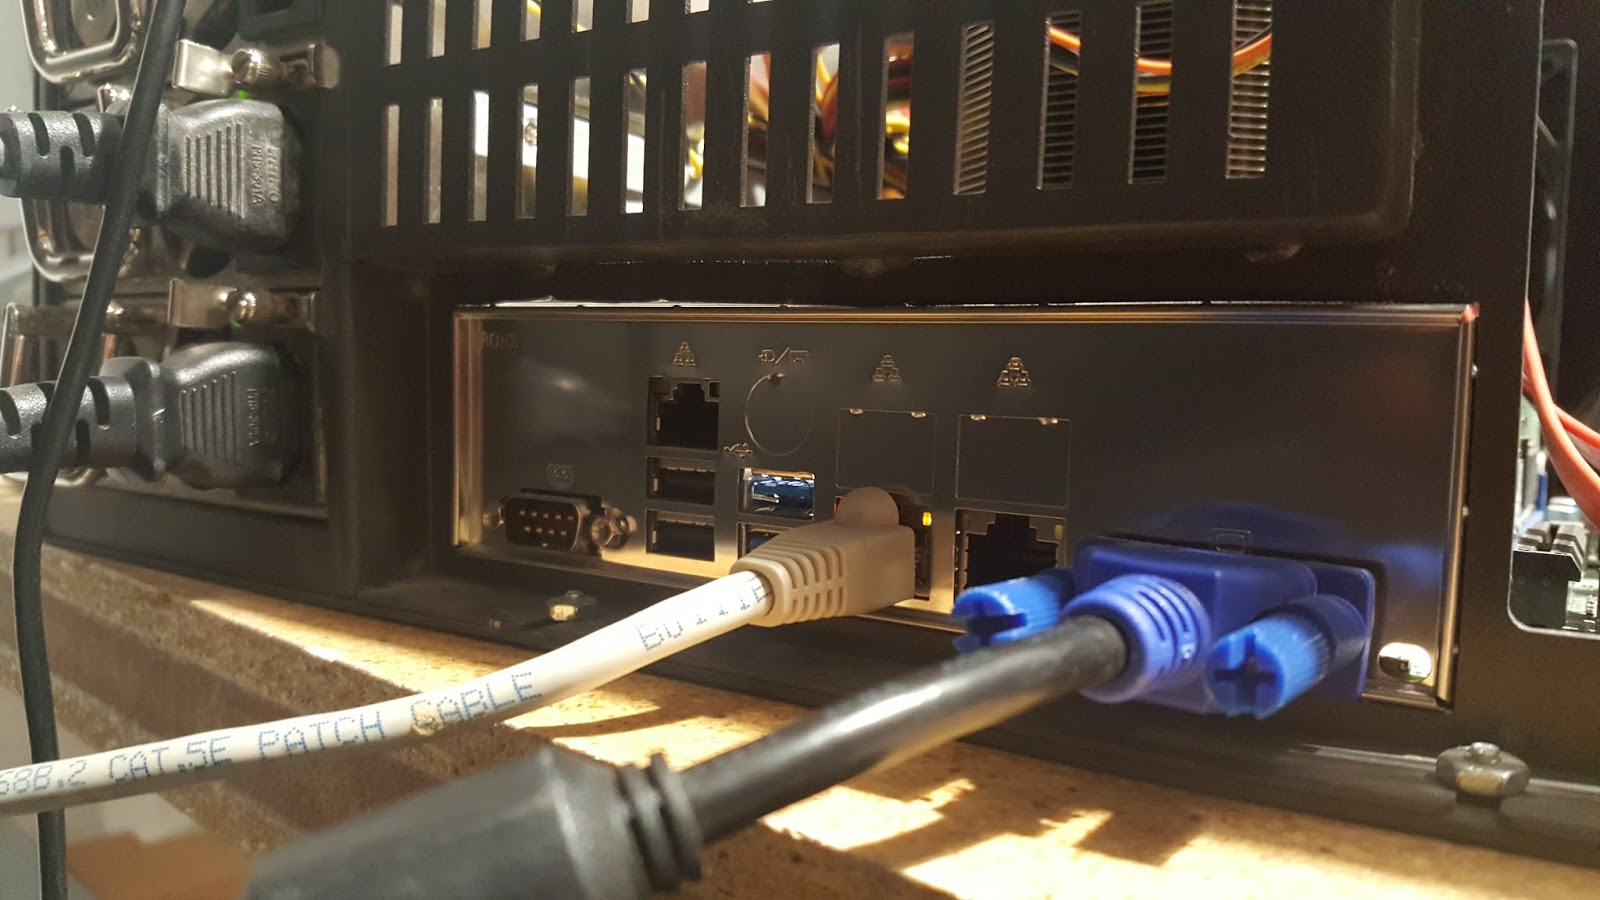
On X10 boards or newer boards, any Ethernet port can be used to set up IPMI, pictured below.
- Access the BIOS by pressing the ‘Delete‘ key when presented with the Supermicro splash screen. Once there, go to the IPMI tab, followed by BMC Network Configuration. Once there you can assign an IPMI address using a DHCP server (Dynamic Host Configuration Protocol) or set it Statically.
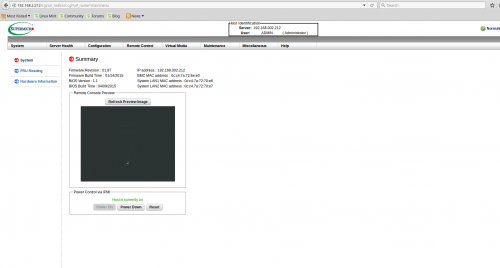
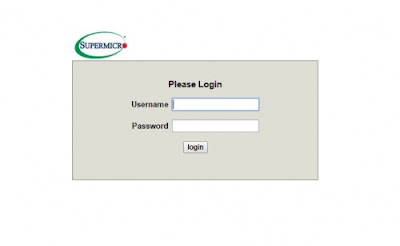
- Once you have assigned an IP address for IPMI, you can type that address into a browser to bring up the Supermicro IPMI page. The default login is ADMIN;ADMIN.
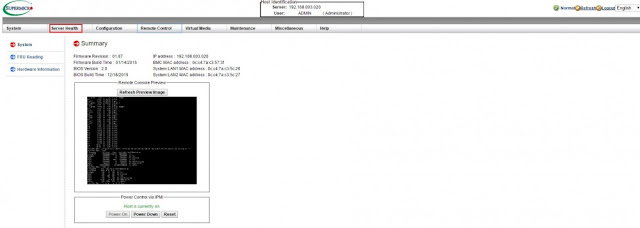
- Here is a sample of what the main screen on the IPMI webGUI looks like.
- To gain full access and control of the machine through a Remote Desktop Java Application, click on the window inside the ‘Remote Console Preview” shown in the above image. This will download a JNLP file, which will open with Java.
Once you have set up and enabled IPMI on your Storinator, you should never have to go to the server(s) directly unless you destroy the hardware completely. This will not only make your job easier because you can be in two places at once but if you ever require outside support it will be easier for support to remote in and help.
Security
In today’s environment, you should make sure that any IPMI connection is made as secure as possible. I highly recommend that you follow as many of these safety measures as necessary below from US-CERT, and the best practices outlined by Supermicro to ensure your interface is protected. By default, the Storinator encrypts traffic and disables anonymous login.
- Restrict IPMI to Internal Networks
Restrict IPMI traffic to trusted internal networks. Traffic from IPMI (usually UDP port 623) should be restricted to a management VLAN segment with strong network controls. Scan for IPMI usage outside of the trusted network and monitor the trusted network for abnormal activity.
- Utilize Strong Passwords
Devices running IPMI should have strong, unique passwords set for the IPMI service.
- Encrypt Traffic
Enable encryption on IPMI interfaces, if possible. All Supermicro X7 motherboards and later generation products have IPMI 2.0 enabled that provides security through encryption algorithms.
- Require Authentication
“Cipher 0” is an option enabled by default on many IPMI enabled devices that allow authentication to be bypassed. Cipher 0 allows anonymous connections. While in some IT organizations anonymous connections may be desirable, in most organizations it is not worth the risk of malicious attack enabled.
By default cipher 0 is disabled on our hardware.
In order to view this setting on your Storinator, run this command in a Linux environment:
ipmitool -H 192.168.0.5 -P PASSWORD -U USER lan print
- Sanitize Flash Memory at End of Life
Follow manufacturer recommendations for sanitizing passwords. If none exists, destroy the flash chip, motherboard, or other areas the IPMI password may be stored.
Conclusion
IPMI is probably already built into your server, so you have the option whether or not you wish to use it. I believe that it is more than worth using if you have a use for full remote access to your storage server from remote locations (whether it is in another building, another city, or just on the other side of your office). Another reason to use IPMI is that if you ever require support, you can get remote help (we do this regularly to help users of our 45 Drives’ Storinators. Security should be a concern. Like any other network connection to your server, its level of security is related to how you configure it (you can certainly make the same argument, for example, about the ubiquitous username password that secures most of everything in the digital world). Follow the suggestions in this blog and you should be able to secure your IPMI to level suitable for most purposes.
Continue reading to find out how to monitor your PSU statistics.
How To Monitor your PSU statistics
Now that you have set up remote access (IPMI), to monitor your PSU statistics enter your IPMI IP address into an internet browser (Firefox or Microsoft Explorer/Edge) to access the IPMI webGUI. You should see the following login page.
Once logged on, you will want to click on the “Server Health” tab shown in the image below, and then “Power Consumption” which will be in the list on the left.
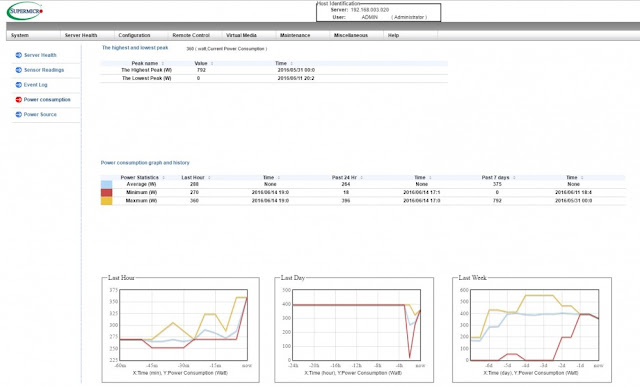
You will now be able to see the power consumption statistics of your Storinator as shown below.
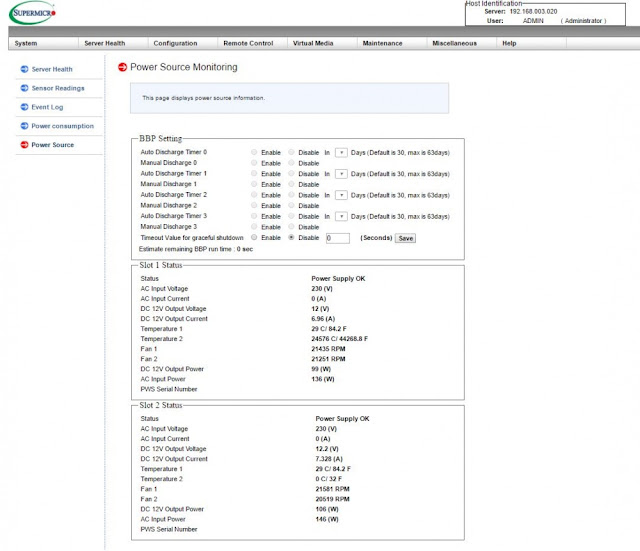
Clicking on “Power Source” which is located right under “Power Consumption” in the list on the left, gives you information on the two PSU modules.
I hope this blog answered any question you may have had and if not feel free to contact us at info@45drives.com or 1-866-594-7199. As always we welcome your feedback so leave a comment below!
References

