In today’s digital landscape, the importance of robust data management and security has never been more important. As organizations strive to safeguard their critical data while ensuring seamless access and scalability, adopting high-capacity storage solutions becomes essential. This blog delves into the process of integrating a Proxmox Storage Cluster into Veeam Infrastructure, emphasizing the strategic role 45Drives plays in this setup. At 45Drives, we allow businesses to seamlessly integrate dependable and expandable storage into their existing infrastructures, ensuring not just efficiency in handling expansive data but also maintaining data integrity and availability. Join us as we explore how the synergy between Proxmox, Veeam, and 45Drives can revolutionize your data storage strategy.
When integrating a Proxmox Storage Cluster into Veeam Infrastructure, choosing reliable hardware is essential for optimal performance and scalability. Whether for small enterprises or large data centers, 45Drives offers the infrastructure support needed for efficient data management within a Proxmox and Veeam setup.
What is Proxmox?
Proxmox is an open-source virtualization management platform designed to simplify the complexities associated with virtual environments. It provides a comprehensive suite of tools to manage both virtual machines and containers, enabling seamless integration and deployment. Known for its robust performance and flexibility, Proxmox allows IT administrators to maximize hardware utilization while maintaining high levels of reliability and efficiency. Built on a Linux foundation, Proxmox supports various guest operating systems and offers advanced features such as live migration, high availability clustering, and backup solutions. Its user-friendly web-based interface and extensive community support make Proxmox a popular choice among enterprises looking to enhance their virtual infrastructure management capabilities.
What is Veeam?
Veeam is a leading provider of backup, recovery, and data management solutions that help organizations achieve comprehensive data protection and business continuity. Focused on delivering a seamless user experience and robust functionalities, Veeam is renowned for its ability to ensure data availability across various environments, whether they be virtual, physical, or cloud-based. Built with scalability and simplicity in mind, Veeam’s solutions empower businesses to mitigate risks associated with data loss and downtime, enhancing operational resilience. The platform supports a wide array of data protection strategies, including backup and recovery, replication, and monitoring, making it an essential tool for IT administrators. By leveraging Veeam’s capabilities, companies can maintain data integrity, streamline backup processes, and ensure prompt disaster recovery, thereby safeguarding critical business operations.
Proxmox and Veeam are both powerful tools on their own. Proxmox excels as open-source server virtualization software, while Veeam shines as a data management powerhouse. The merger of these two into your existing infrastructure can deliver potent results. As promised, lets walk through how you can add a Promox storage cluster into your Veeam software.
Part A: Integrating Proxmox into Veeam
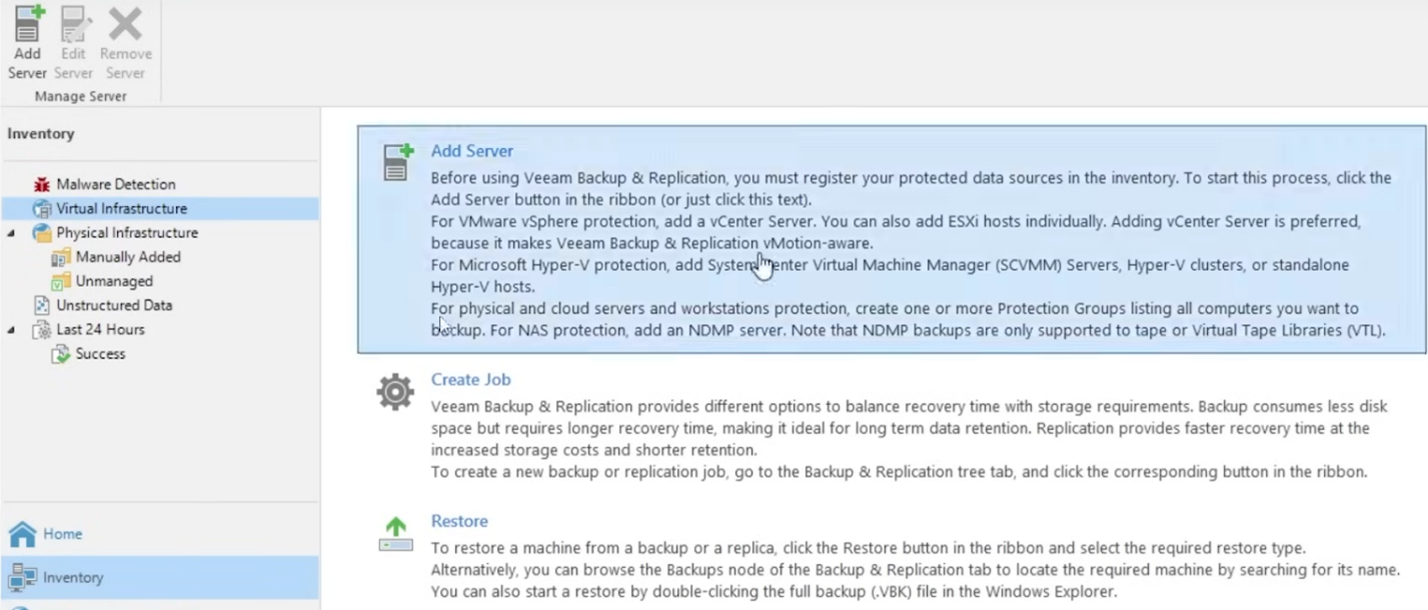
Step 1 : Begin by launching the Veeam Backup & Replication console. Navigate to the ‘Add Server’ option located within the Veeam Infrastructure tab. Here, you’ll have the opportunity to manage the external storage solutions seamlessly. Ensure you’re logged in with appropriate privileges to initiate this integration process.

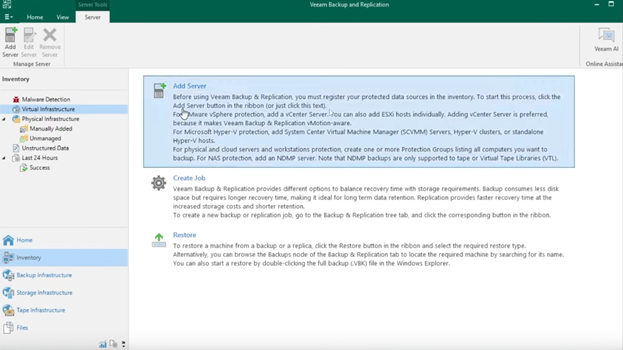
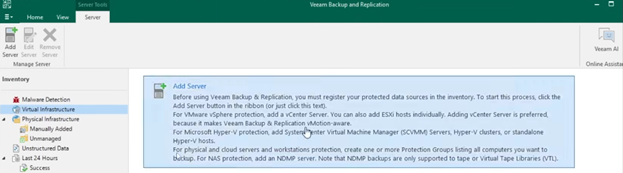
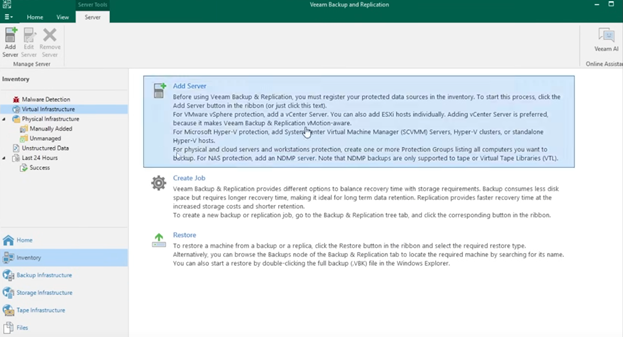
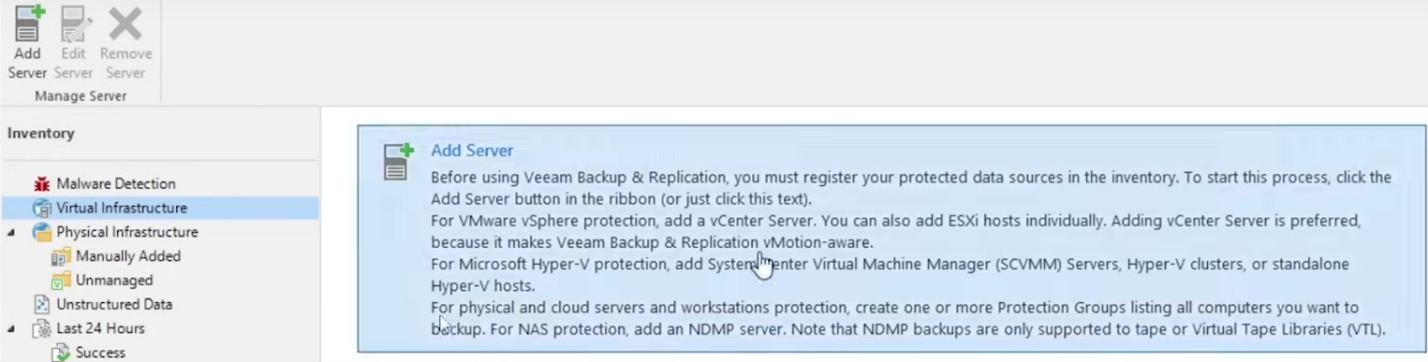
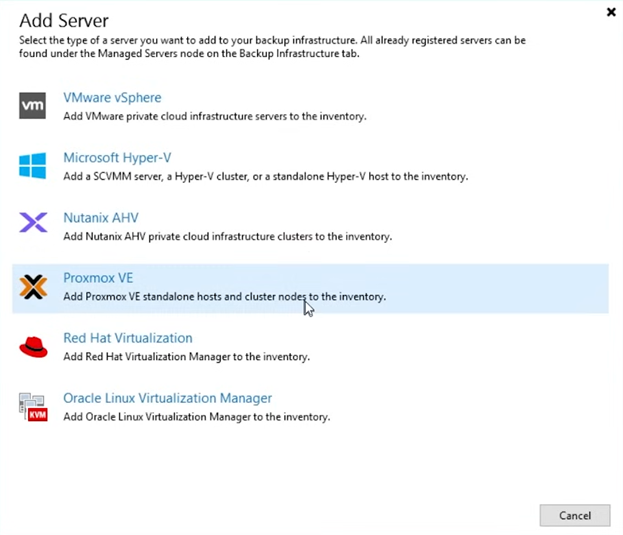
Step 2: Once you have navigated to ‘Add Server,’ select the ‘Proxmox VE’ option.

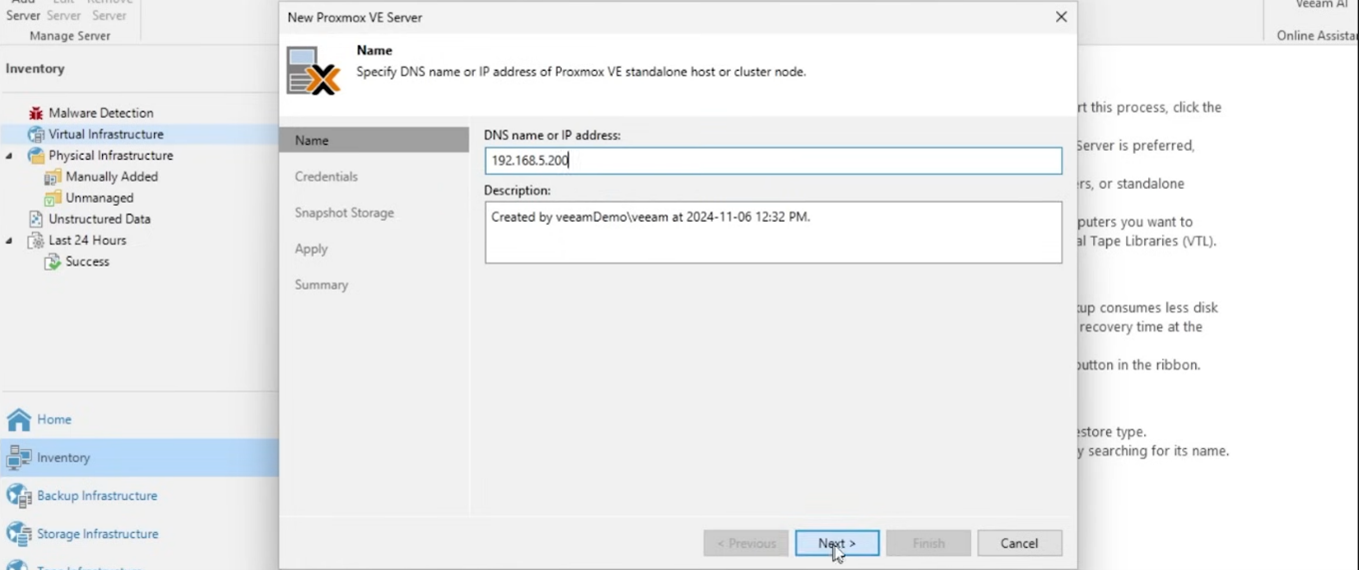
Step 3: Enter the necessary Proxmox credentials, including the hostname or IP address, port, and SSH access details. Ensuring you have administrative access is crucial at this stage to enable smooth connectivity between the systems.
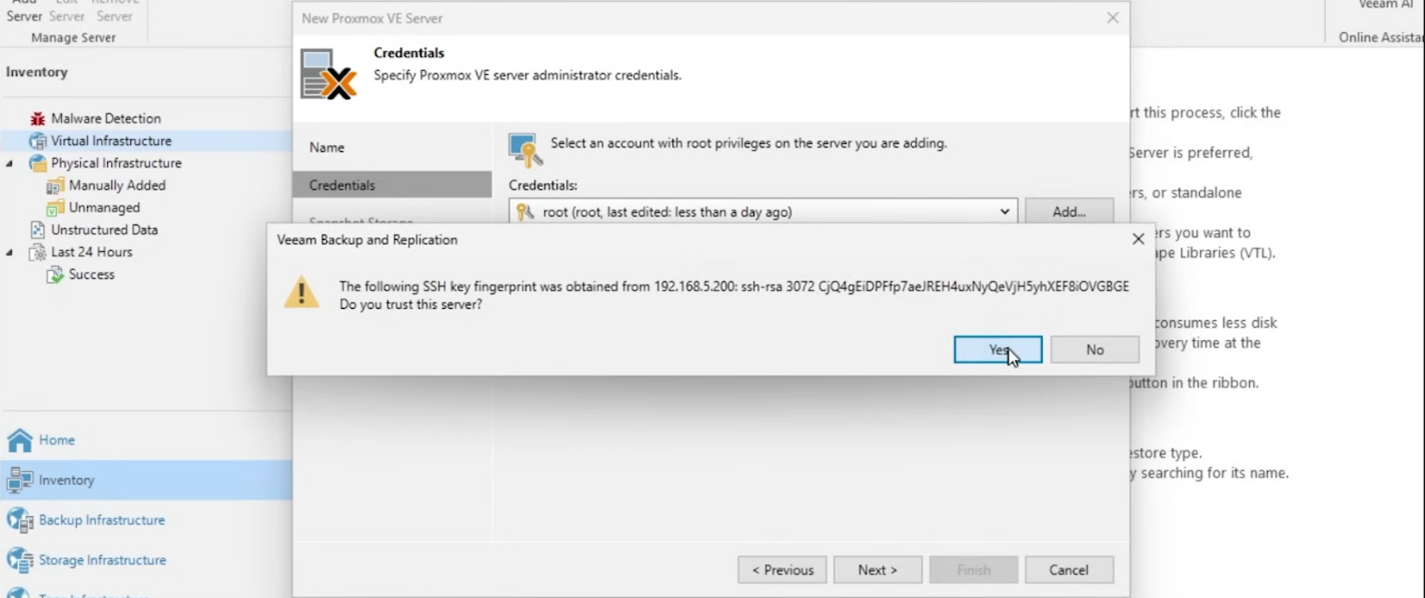
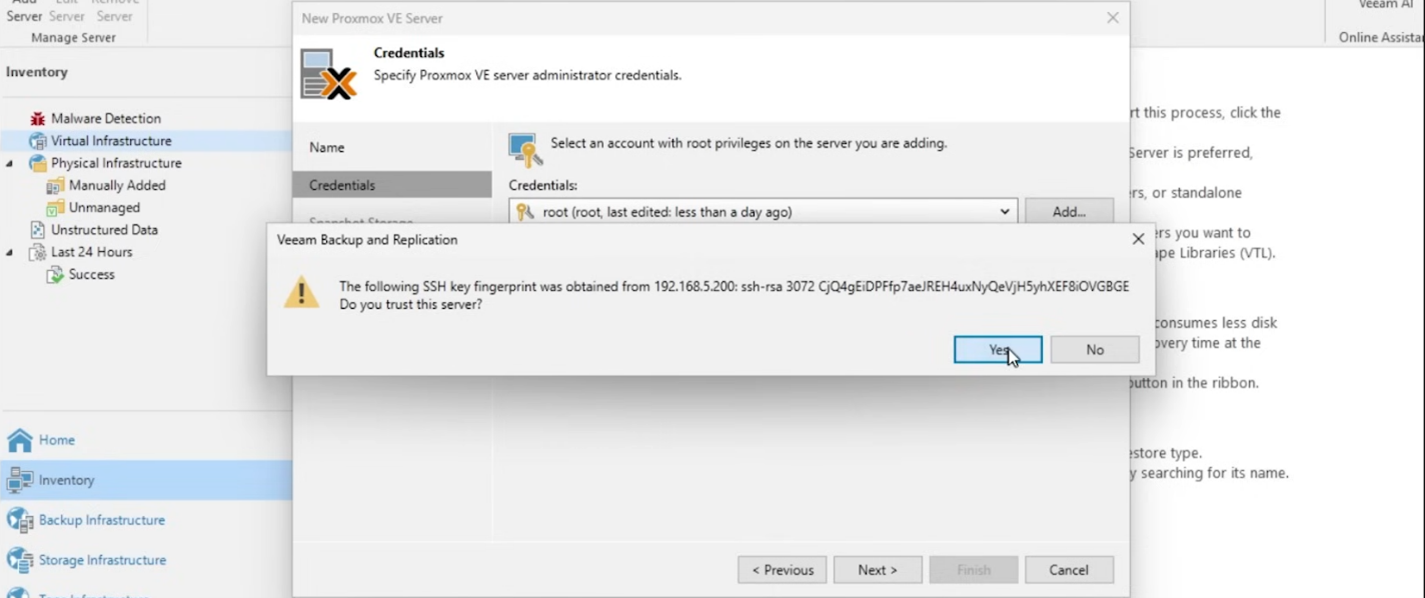
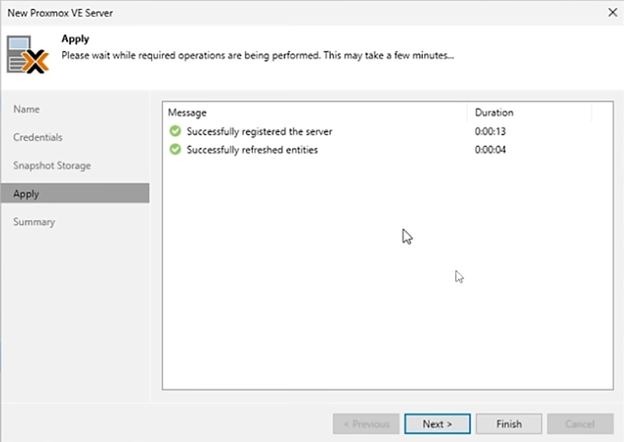
Step 4: Navigate to the apply section, Veeam will start the registration process for the Proxmox VE infrastructure. Once complete, Veeam will report a successful registration.
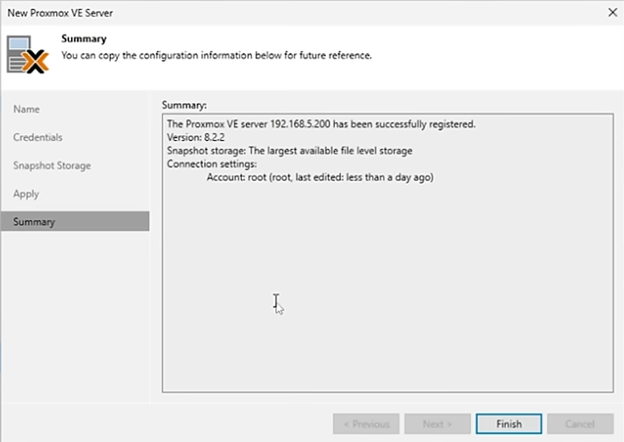
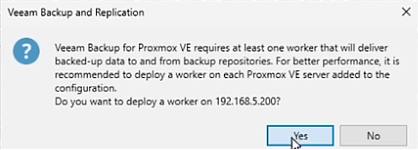
Step 5: Veeam Backup requires a worker virtual machine that will be utilized for transfer data to the repository for Proxmox VE. Veeam will ask to configure a worker VM. For best performance it is recommended to deploy a worker VM on each Proxmox host within the environment.
Step 6: Continue through the worker virtual machine configuration. Set the virtual machine name, and the backing storage the worker will consume in the Proxmox environment. Advanced configurations
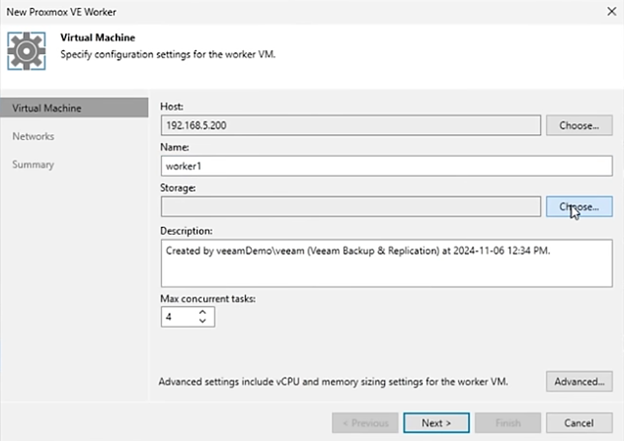
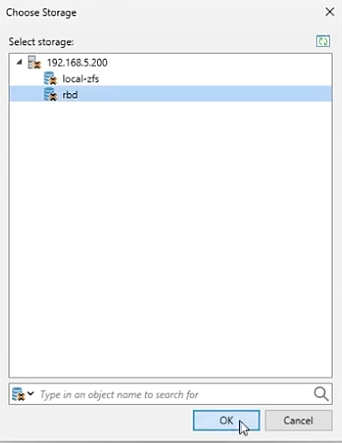
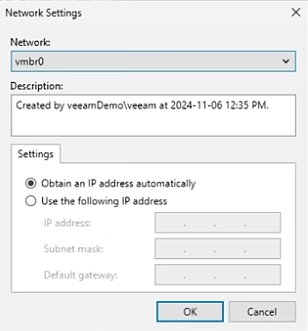
Step 7: Select the network configuration for the worker virtual machine will utilize. DHCP or manual address assignment is supported.
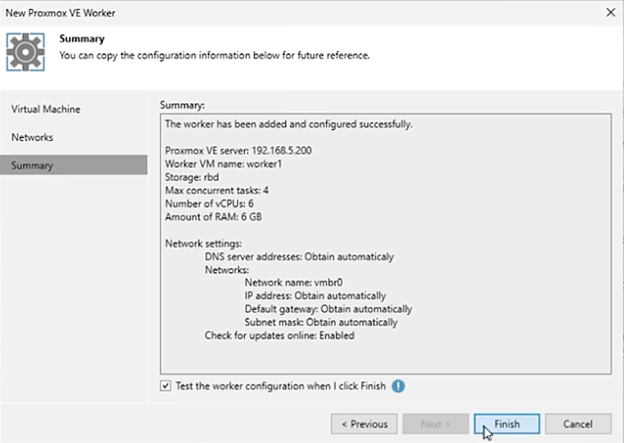
Step 8: Finalize the worker virtual machine to facilitate the Veeam backups. Veeam offers functionality to verify the worker configuration.
Part B:
Step 1: In Proxmox, go to the storage configuration settings to adjust the backup storage repository. You’ll want to allocate sufficient space and permissions for Veeam backups. It’s important to configure appropriate storage settings to prevent any bottlenecks during the data transfer process. In this case the storage is being presented to Veeam through a Ceph gateway as a backup repository.
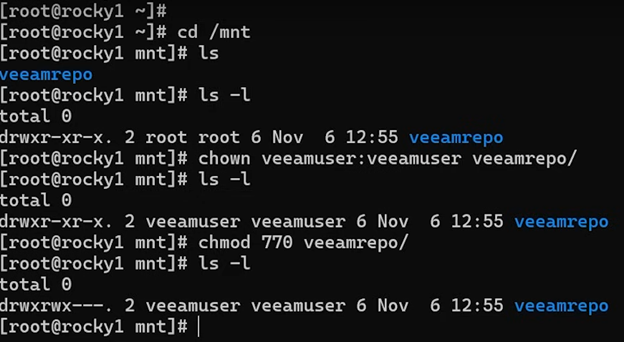
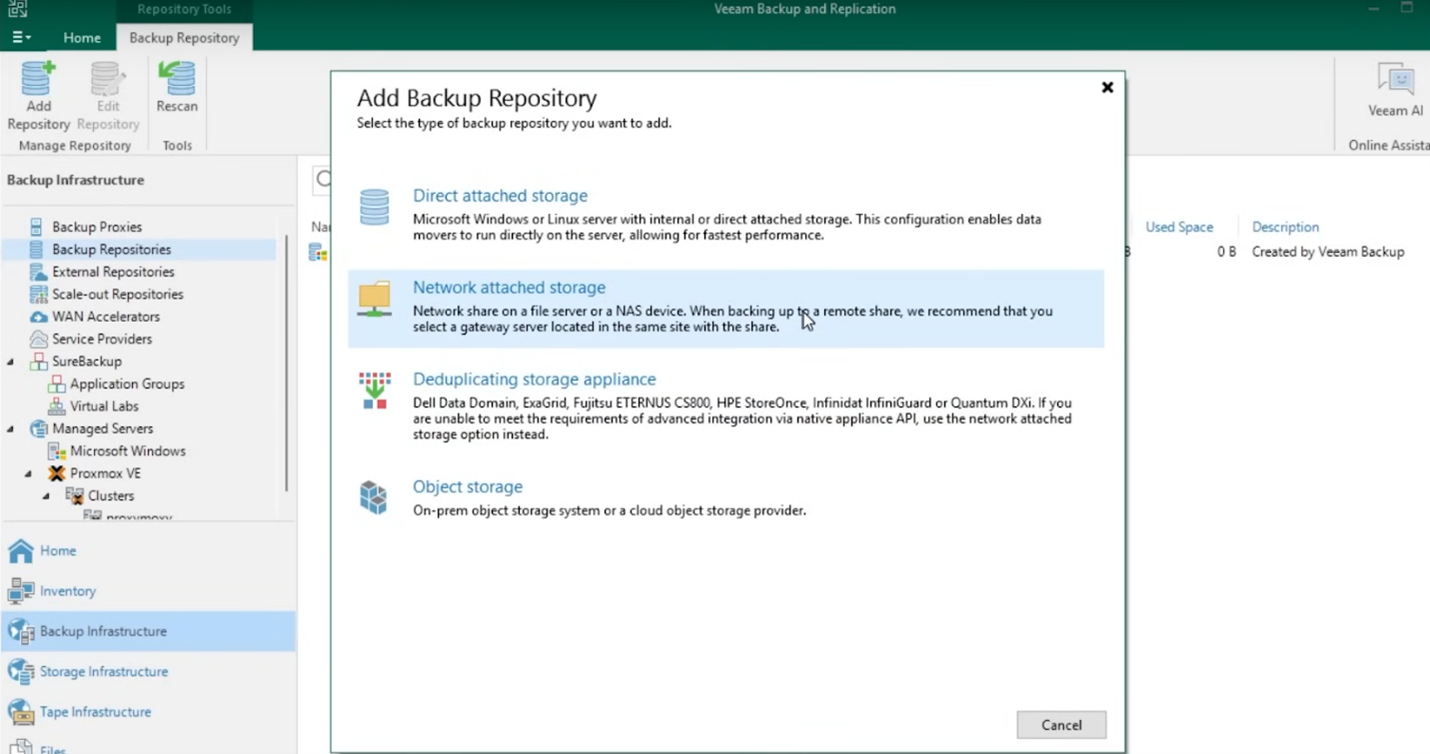
Step 2: Back in the Veeam environment, create a new backup repository by selecting the repository type that suits your storage setup, such as a CIFS share or a physical Linux server. Configure this repository with sufficient capacity to handle your projected backup loads. Detailed logging can also be set up here to troubleshoot potential issues later.
Step 3: To verify the integration, execute a test backup job that includes your Proxmox cluster. Monitor the progress and check for any errors that may occur during the backup process. Successfully completing this job will confirm that your Proxmox storage cluster has been effectively integrated into the Veeam infrastructure, ensuring a robust data protection strategy. VSSP
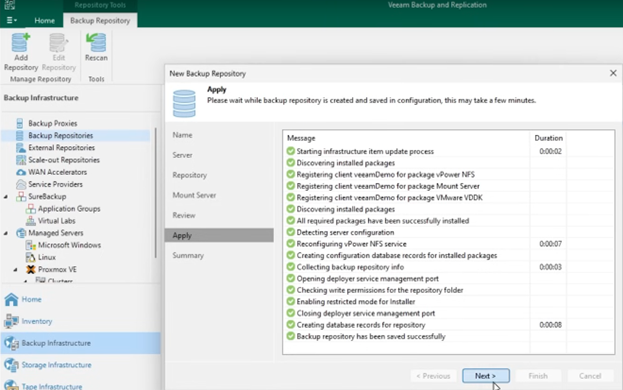
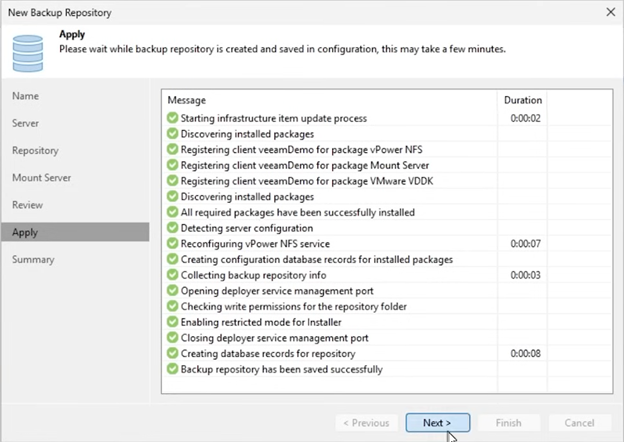
Remember, integrating Proxmox Storage Cluster into Veeam Infrastructure creates a robust and flexible environment for data management and storage.
For a full video of this entire process (“How to Add a Proxmox into Veeam using Ceph RBD”) in more detail, click here.
Conclusion:
In conclusion, the integration of a Proxmox Storage Cluster into Veeam Infrastructure is a strategic move for enhanced data management. With this quick step-by-step guide, the process should be straightforward, leading to improved functionality, scalability, and resilience of your data infrastructure.
Incorporating 45Drives into the integration of Proxmox and Veeam further bolsters the overall architecture, offering unparalleled scalability and performance. 45Drives not only complements the seamless virtualization and comprehensive data management capabilities of Proxmox and Veeam but also enhances storage flexibility and cost-effectiveness. This synergy ensures data integrity and availability, supporting high-demand workloads and complex data management tasks with ease. By leveraging 45Drives’ robust infrastructure, businesses gain a powerful edge in managing growing datasets and securing critical data assets, ultimately driving technological innovation and business success.